.svg)
How to Connect Webflow Websites with Google Search Console

Connecting your Webflow site with Google Search Console
Learn how to verify ownership of your Webflow website on Google Search Console. This grants you access to a plethora of insights regarding your web pages, empowering you to enhance them and track their performance within the Google search engine.
What is Google Search Console?
Google Search Console is an invaluable resource for analyzing your website’s visibility and performance in search engines. Through this platform, you can submit your sitemap to Google, track how your pages are indexed, and monitor the overall health of your Webflow site on search engines like Google and Bing. It provides detailed insights into your search performance metrics, allowing you to evaluate the success of your SEO strategies and understand the indexing status of your web pages.
Moreover, Google Search Console helps you identify and resolve indexing issues by alerting you to potential problems and offering the option to remove specific URLs from search results. This tool’s extensive features go beyond basic tracking, making it a crucial asset for anyone involved in SEO. By utilising the insights and capabilities of Google Search Console, you can enhance your website’s search engine presence and effectively address any issues that may arise.
Add Your Webflow Site to Google Search Console and Verify Ownership via URL Prefix
Step 1: Access Google Search Console
- The first thing you need to do is access Google Search Console - you can do this simply by typing Google Search Console into the Google search bar. Once there, you’ll be asked to sign in with a Gmail account, either personal or business-related.
- If you're new to Google Search Console and haven't added any properties yet, you'll be taken to a new page and prompted to select the ‘Type of Property’ for validation.
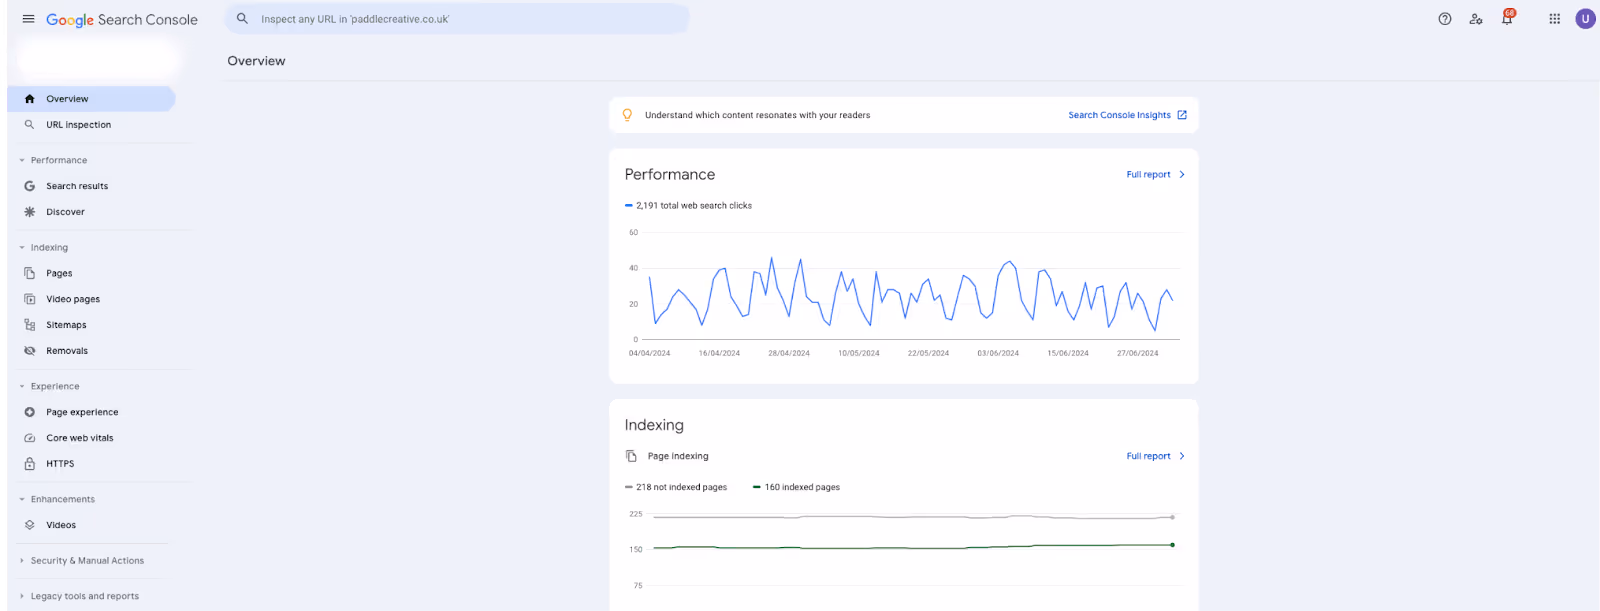
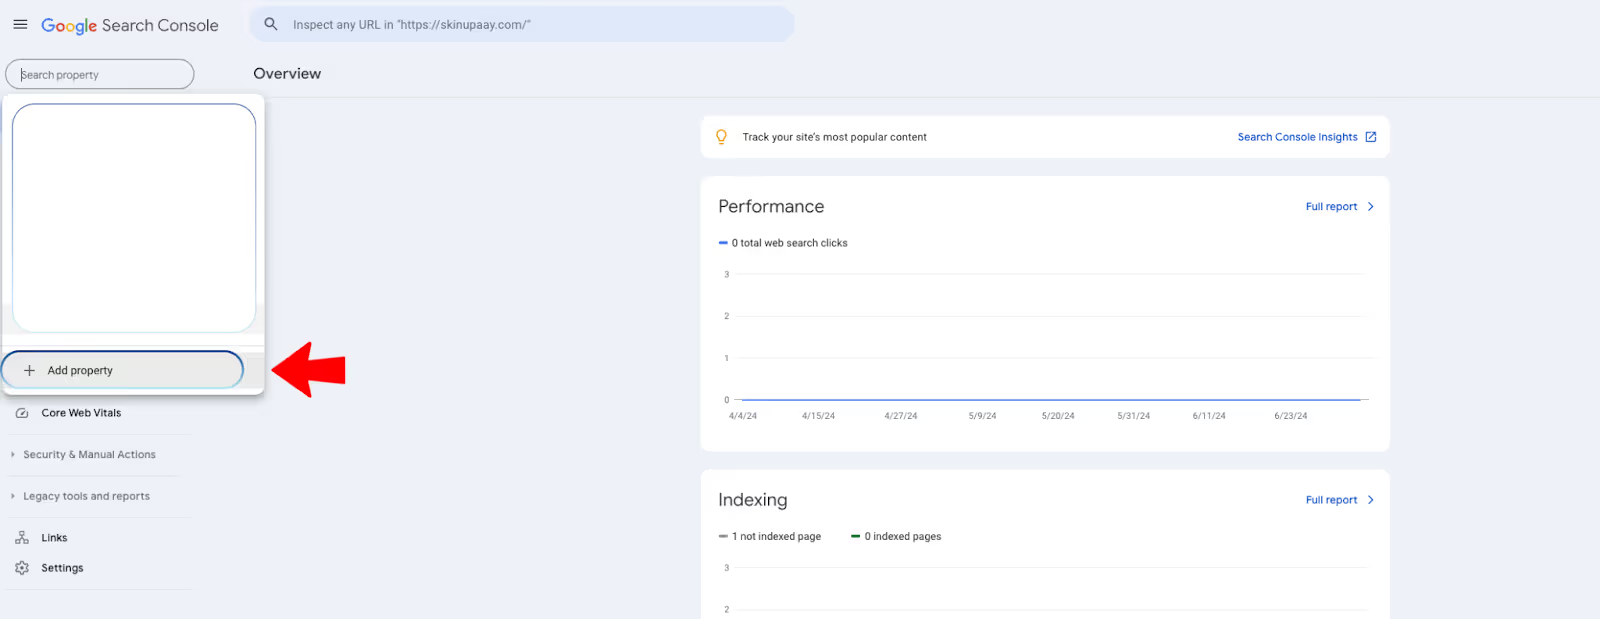
- If you already have a Google Search Console account set up and are running other properties, you will be directed to the interface of one of those properties. To validate a new property, like your Webflow site, click on the name of the current property (found above the overview) and choose ‘+ Add property’.
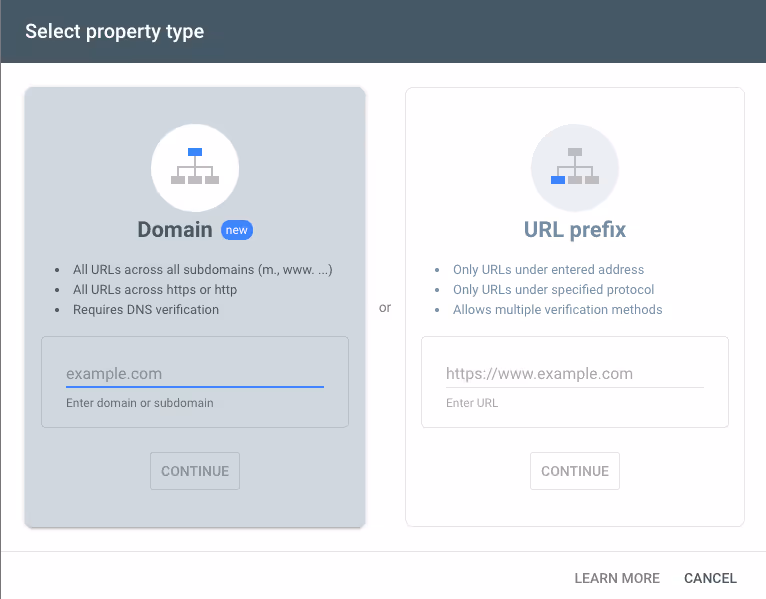
- A pop-up window will emerge, prompting you to ‘Select Property Type’.
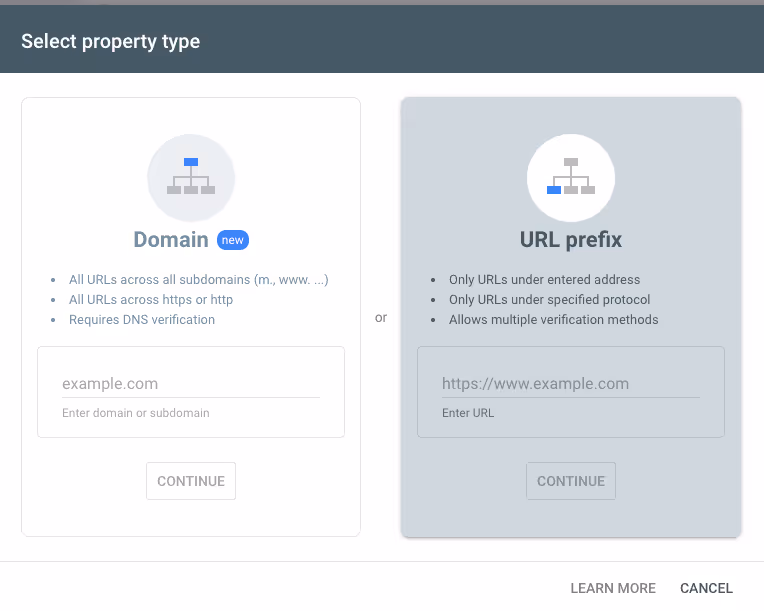
Step 2: Enter Website URL
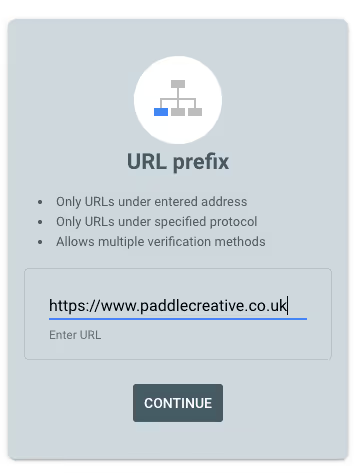
- Next, select the ‘URL prefix’ option. In the provided field, enter the full URL of your website - typically the homepage. For example, https://www.paddlecreative.co.uk.
- After entering the URL, click on the "Continue" button to move to the next step.
Step 3: Verify Website Ownership with Google Verification ID
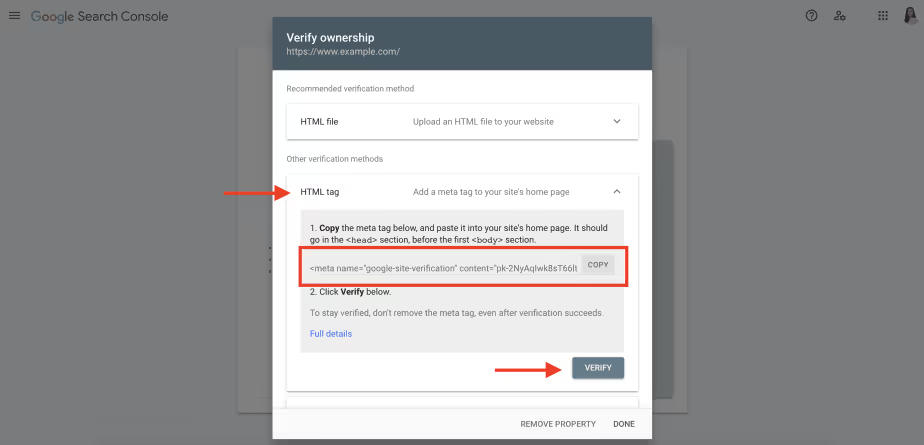
- Once you’ve clicked ‘Continue’, you'll be directed to a new page (Validate property). Here, various verification methods will be presented.
- Opt for the "HTML tag" method and select "HTML Tag". A drop-down text will appear, prompting you to copy a "meta tag". Only copy the sequence of characters following ‘content=’.
IMPORTANT: Do not close this tab - you will need to return here later.
Step 4: Paste the Verification ID in Webflow
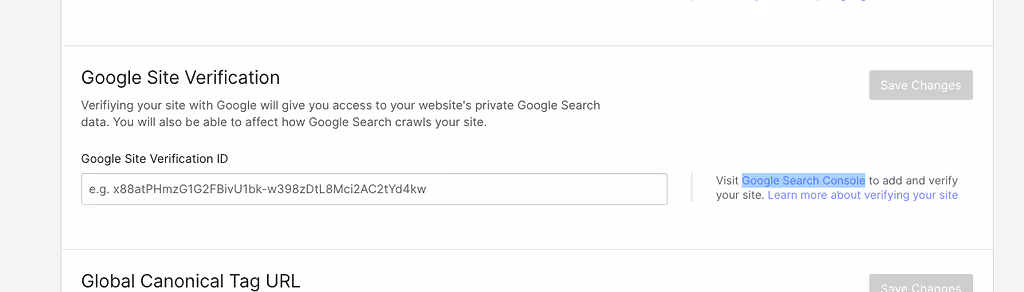
- After copying the character sequence, go into the settings of your Webflow project.
- Navigate to the SEO tab, scroll down, paste the TXT code into the ‘Google Site Verification’ section, and click ‘Save Changes’.
If your domain name provider or web host is something other than Webflow, this step may be slightly different. Nevertheless, you should be able to access the DNS records by clicking Manage DNS for your domain in a similar place. If you are unable to find this in the settings, have a look at the provider's help centre.
Step 5: Complete Property Validation in Google Search Console
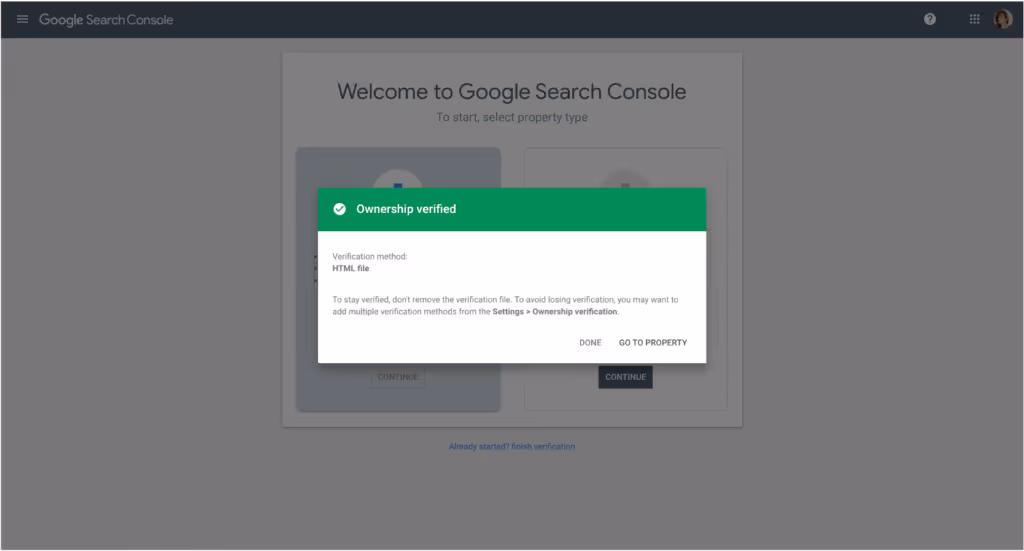
- Now that you’ve completed the above steps, you need to return to the Google Search Console page (from step 3). From here you, need to select the ‘Submit’ button (located next to the ‘Submit Later’ button), and then you’re all set!
- Your property should now exist on Google Search Console and enable you to monitor and manage the online presence of your business website.
Adding Your Webflow Site to Google Search Console and Verifying Ownership via Domain Name
In this section, we'll guide you through the process of adding your Webflow site to Google Search Console and validating ownership via the domain name.
By following these steps, you'll ensure that your website is accurately indexed and monitored by Google, empowering you to enhance its visibility and performance on search engines.
Step 1: Open Google Search Console
This is the same as Step 1 above. You need to open and log into Google Search Console using your Gmail account, just as you did in the URL Prefix process. Once logged in, click on the "Add Property" button to begin adding your website.
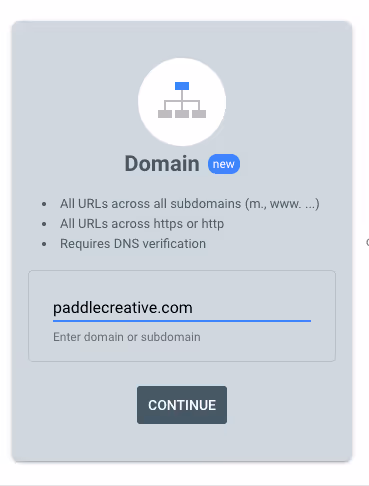
Step 2: Input Website Domain Name
- From here, you need to insert your website's domain name (don’t add https:// or www) into the Domain section.
- Click ‘Continue’ after you have entered the domain name.
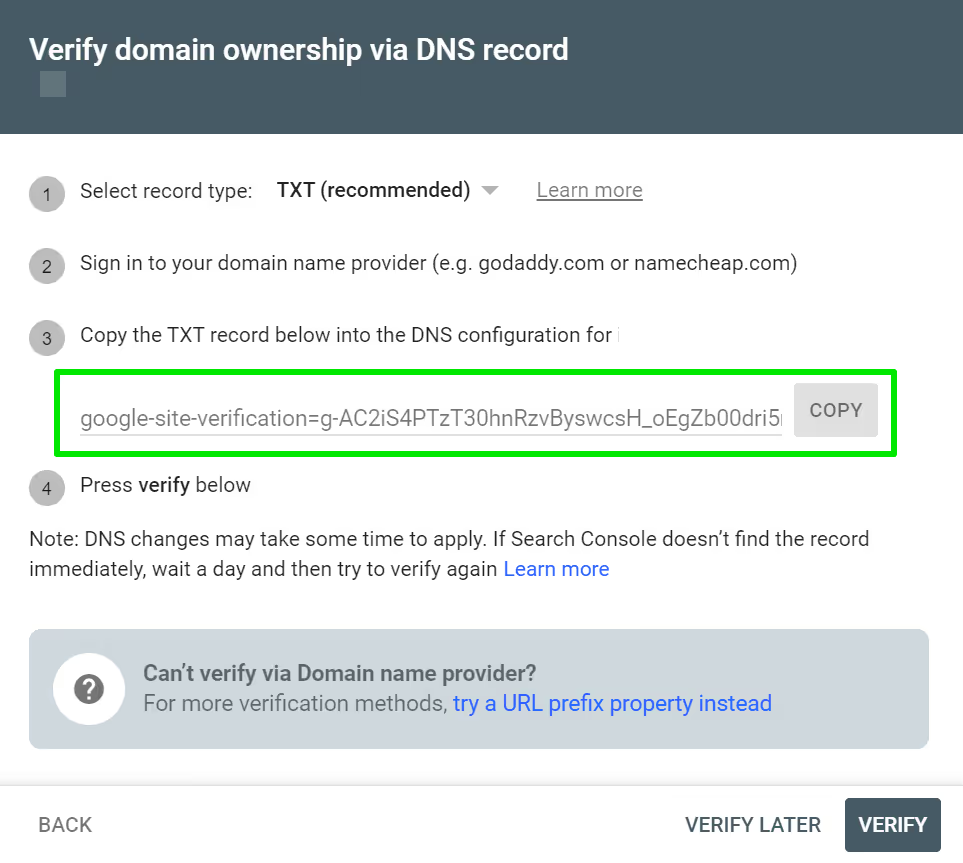
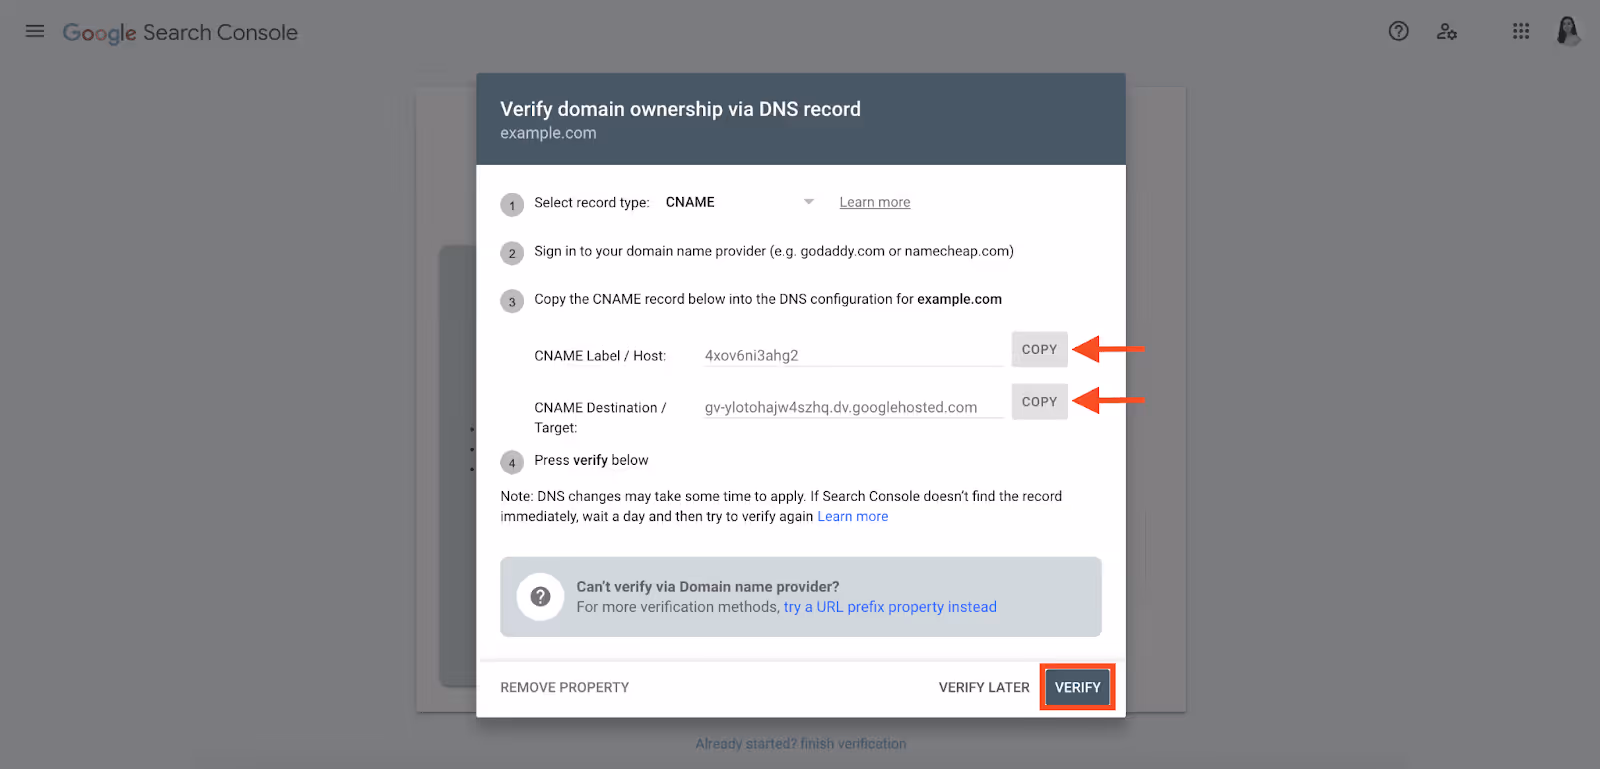
Step 3: Copy the TXT Record from Search Console
- Once you’ve clicked ‘Continue’, a new window will appear displaying important information and a code. Your primary task here is to copy the ‘TXT record’ given by Search Console.
IMPORTANT: Don’t close the Google Search Console validation page during this step.
Step 4: Validate Ownership via Your Domain Name Provider
- The process might differ slightly based on your domain name provider or web host, but the basic steps remain the same.
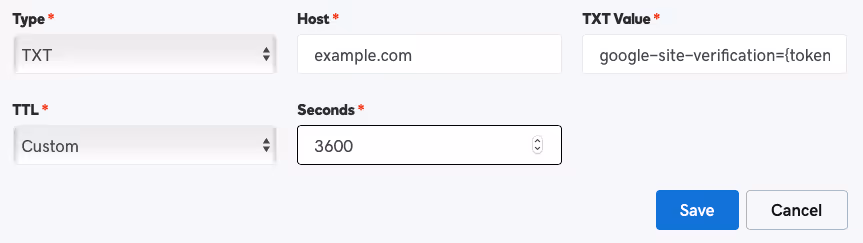
- Access your domain's DNS records and go to the record settings.
- Add a TXT record, and paste the code copied in the previous step into the TXT field.
Step 5: Complete Property Validation in Google Search Console
- Return to the Google Search Console page (from step 3) and click the ‘Submit’ button (located next to "Submit later").
- You’ve now added your Webflow site to Google Search Console and can begin accessing all important data ready to make date driven decisions.
Conclusion
You’re now equipped with the tools to monitor and optimise your online presence, drive more traffic, attract potential customers, and achieve your digital marketing goals! Remember to regularly utilise Google Search Console's features to track your progress and make informed decisions for continued success.
Need help connecting Webflow with Google Search Console? Contact us now.
.jpg)
%20(1)%20(1)%20(1).jpg)
.jpg)
%20(1).avif)
.avif)
.avif)