.svg)
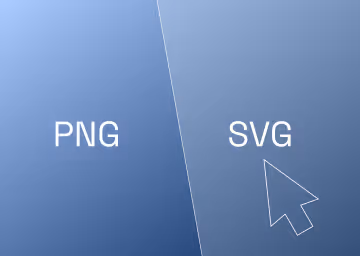
How to Apply a Colour Gradient to Text in Webflow
Learn how to add Gradient Text in Webflow.


Gradient texts have been a part of the web design trend since Apple popularized the beautiful scroll animation on gradient text and using various types of gradient texts across their website. Webflow provides the capability to add all sorts of gradients to texts (and it is much simpler to achieve than you’d think).
In this guide, we'll take you through a step-by-step journey to show you how to leverage Webflow's versatile Style Manager and seamlessly integrate colour gradients into your text elements. Whether you're a seasoned designer or a novice enthusiast, this guide will equip you with the knowledge and skills needed to elevate your designs to new heights.
Step 1: Load Your Webflow Project in Designer
To start this process, you need to navigate to your Webflow project and locate the section where you wish to apply a gradient to your text.
Step 2: Select the text you want to give the gradient and select ‘wrap with span’.
Now that you’re in the correct Webflow project and are on the intended page, select the text element you intend to enhance with a gradient. Assign a class to it; for instance, "text-color-gradient".

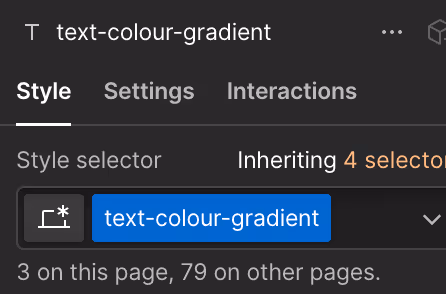
Note: If you adhere to the Client-First method advocated by Finsweet, you may want to consider creating your class directly in the Style Guide and then applying it to relevant elements.
Step 3: Stylise the Class with the Gradient
Once you've constructed your class, you can apply various styles (CSS code) to it. Here, we'll navigate to the "Backgrounds" area. Three parameters are present in this section: colour, image and gradient and clipping.
Image & Gradient
In the "Image & Gradient" section, you'll encounter a range of gradient options to choose from. Click on the "+" symbol to explore these choices, which include traditional linear and radial gradients, as well as the ability to incorporate background images or overlays.
This is your opportunity to experiment and find the gradient style that best suits your design goals. Whether you prefer subtle transitions or bold contrasts, Webflow offers the flexibility to achieve your desired effect with ease.
Clipping
In the "Clipping" parameter, you'll find an essential option that ensures seamless integration of your gradient with text elements - you need to select "clip background to text" under the clipping parameter. By selecting "clip background to text," you instruct the system to apply the background gradient exclusively to the text itself.
This precise control prevents any overflow or bleeding of the gradient beyond the text boundaries, resulting in a polished and professional appearance. With this option enabled, your gradient seamlessly merges with the text, enhancing readability and visual impact without any distractions.
Step 4: Best Practice : Reuse the Class Several Times
Once you've crafted the perfect gradient effect for your text, you may want to extend this aesthetic across multiple text elements within your project. Fortunately, Webflow makes this process seamless. Simply apply the class you've created, such as "text-color-gradient", to each text element where you desire the gradient effect to be replicated.
By applying the class consistently across various text elements, you maintain design coherence and ensure a cohesive visual experience throughout your website. Whether you're highlighting headings, paragraphs, or call-to-action buttons, the consistent application of your custom gradient class adds a professional touch to your design while elevating the overall aesthetic appeal.
Conclusion
By following these steps, you are able to effortlessly add captivating colour gradients to your text elements in Webflow, enhancing the visual appeal of your projects. This simple yet powerful technique allows you to create engaging designs that stand out.
For further assistance or to explore more design possibilities, feel free to reach out to the Paddle Creative team. We're here to support you in your design journey and provide additional guidance as needed.
.jpg)
%20(1)%20(1)%20(1).jpg)
.jpg)
%20(1).avif)
.avif)
.avif)