.svg)
Top 7 Most Important CSS Custom Codes to use in your Webflow Projects

With these crucial code snippets, you can master the art of CSS custom code in Webflow and improve the overall look and feel of your website.
Introduction
As Webflow Developers, we know that Webflow is a powerhouse for crafting stunning, bespoke websites. To realise those imaginative concepts and produce something genuinely original, we occasionally need to go beyond Webflow Designer's built-in capabilities. This is where custom CSS becomes invaluable.
Integrating custom code into your Webflow endeavours unlocks a realm of endless potential for tailoring and refining, whether it's adjusting page layouts, honing typography, or infusing distinctive animations. In this resource, we’ll explore a selection of straightforward yet powerful CSS code snippets designed to achieve feats unattainable within the native Webflow Designer, giving you the upper hand when it comes to design and functionality.
Essential CSS Codes for Enhanced Webflow Projects
Throughout this section, we will explore essential CSS codes to elevate your Webflow projects, covering page layout, typography, and dynamic CSS interactions. Let’s start with techniques to prevent horizontal scrolling using sticky positioning.
1. Changing Webflow's Default Styles
Within Webflow's framework, default styling is applied to essential HTML elements like links, form fields, and navigation bar links. This serves to maintain visibility and usability, even in instances where direct styling hasn't been implemented. However, there may be occasions where a finer level of control over these elements is desired, enabling them to inherit styles from their parent containers.
For instance, when crafting a personalised card layout using a Link Block, you may find the default underlined text treatment of links unsuitable for your design. For times like this, the following code snippet comes to the rescue. It empowers you to customise and overwrite the default styles of these elements, ensuring they seamlessly adopt the CSS attributes of their parent containers, thereby enhancing design flexibility and consistency.
Adding this CSS snippet from Client-First's global styles ensures that styles (colour, size, underlining, etc.) are inherited from the parent element. If you want to apply a specific, non-inherited style, you can always add it directly to the element.
Application Example
This snippet is handy if you want to remove Webflow's default CSS styles and manage the styles of targeted elements more globally.
2. How to Stop Horizontal Scrolling
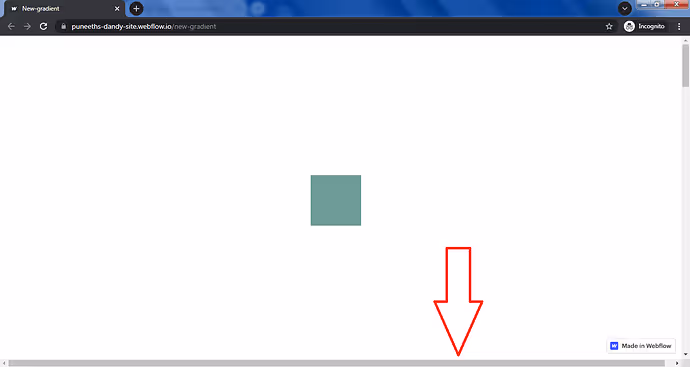
A common issue in web design is unwanted horizontal overflow, where content extends beyond the browser window, leading to frustrating horizontal scrolling. As Webflow developers, we want to ensure each visit to our Webflow website is as smooth a transition as possible, and having to move the screen from left to right and back again is not going to keep visitors on your website for long.
To address this problem, you can add {overflow: hidden}; to the section or page wrapper. However, this has a drawback as it disables the position: sticky; property on any child elements, which can be inconvenient.
Instead, you can use the following property on the page-wrapper class to prevent horizontal scrolling while still allowing sticky positioning:
Adding overflow: clip; to an element will prevent horizontal scrolling while allowing the use of position: sticky; on child elements.
Use Case:
Apply this CSS property to the page-wrapper to prevent unwanted horizontal scrolling.
3. Enhance Parental Hover Effects for Element Styling
In Webflow's style panel, you can change an element's properties when it is hovered over. However, you might need to modify a child element's properties when its parent element is hovered over.
While you can use Webflow's interaction panel for this, it requires integrating JavaScript, which is heavier than a few lines of CSS, making CSS more suitable for small-scale interactions.
To style an element when its parent is hovered over, you can use the following CSS snippet:
The :hover selector indicates that the animation will occur when the parent element is hovered, and the .children selector immediately following it (without a comma) indicates that the child element will be styled.
Application Example
If you want to change the width of an underline (created with a Div Block) from 0% to 100% when hovering over a custom button, you can manage the hover animation by adding the following CSS snippet:
4. Avoiding Isolated Phrases and Punctuation.
Here’s a little twist: this is not a CSS snippet but a handy keyboard shortcut for inserting a special character…
When editing text, seeing a small word or punctuation symbol isolated on the last line can be frustrating. For example, a lone "?" on its own line. To avoid this, you can add a non-breaking space with Shift + Space, ensuring that the words around this space always stay on the same line.
Example of Application
This is particularly useful to add just before a "?" or "!" punctuation mark, such as in a FAQ.
5. Adapting Selection Color
Customising the colour of text selection can enhance your site's brand identity and make it stand out. You can use the following CSS code snippet to achieve this:
This CSS snippet allows you to specify both the background colour and the text colour when users select text on your site.
Example of Application
This can be used to reflect a site's brand identity and ensure the selection colour matches its overall aesthetic.
6. Customising Specific Collection Items
When working with collections in Webflow, you might want to style a specific element differently from the others. Here's a snippet to help you do that:
This CSS code targets a particular element in a collection (in this example, the third item) and applies specific styles to that element only (or to one of its children).
Alternatively, to target several items at regular intervals, you can use the following snippet:
In the previous CSS code, the first number defines the interval, while the second number specifies the position of the target element within this interval. Thus, the code targets the second item in each group of four: 2 (40 + 2), 6 (41 + 2), 10 (4*2 + 2), and so on.
Application Example
This CSS snippet is particularly useful for adding variation to a long CMS collection.
7. Achieving Balanced Text Across Lines
Similar to the previous issue, headlines can sometimes have unbalanced text distribution across lines, which can be frustrating and lack some aesthetic.
To fix this, you can use the following CSS property to balance text distribution on all lines. Since this is a specific situation, it’s best applied to a custom attribute rather than a specific class.
Example of Application
This CSS property is particularly useful for balancing the distribution of certain headlines, ensuring the design remains as balanced as possible.
Conclusion
With these custom CSS code snippets, you can push the boundaries of your Webflow designs and significantly enhance the appearance or behaviour of specific elements on your Webflow site. These techniques provide you with the flexibility to meet your unique design requirements, making your Webflow websites stand out from the crowd.
For more information and services, visit our Webflow agency. You may also find these related articles useful:
- Creating Responsive Web Designs in Webflow
- Optimizing Webflow Sites for SEO
Additionally, you can explore Webflow University for more tutorials and resources.
If you have any questions or need further assistance, feel free to reach out to our team at Paddle Creative. Happy coding!